How to Add a New User on Sage 50 Accounts
Create New Accounts in Sage 50 – Instructions
Create New Accounts in Sage 50: Overview
You can easily create new accounts in Sage 50. If you created your chart of accounts using one of the business types listed in the "New Company Setup Wizard," then you likely have a full chart of accounts which will give you all the accounts necessary to run a business. However, you may want to add, delete, or rename specific accounts in the default chart of accounts. You will also need to enter "opening balances" for your accounts, as well. This can be done using the "Maintain Chart of Accounts" window. You can open this window by selecting "Maintain| Chart of Accounts…" from the Menu Bar.
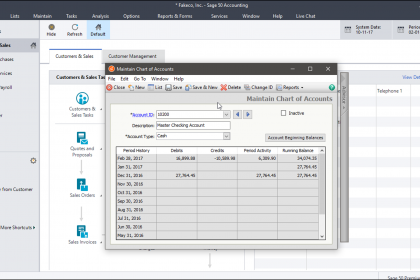
In the "Maintain Chart of Accounts" window you add, rename, and delete accounts. You also use it to enter opening balances for accounts and prepare account budgets. Notice the toolbar at the top of the window. It contains buttons that allow you to add, edit, and delete accounts from your company file's chart of accounts. Use the "Close," "New," "List," "Save," "Save & New," "Delete," and "Change ID" buttons to modify the accounts.
Below that toolbar, you can use the "Account ID" drop-down to identify the account by ID. The account ID can be up to fifteen characters in length and alphabetic and/or numeric. You can use the "Change ID" button to change account IDs. The "Description" field shows a description for the account. You can also use the "Inactive" checkbox to make the selected account inactive.
Notice all the accounts that appear when you click the "Account ID" drop-down. Click on any ID to select it from the list. To view a listing of all the accounts within your chart of accounts, click the "List" button in the window's toolbar to open up a separate account list in a new window.
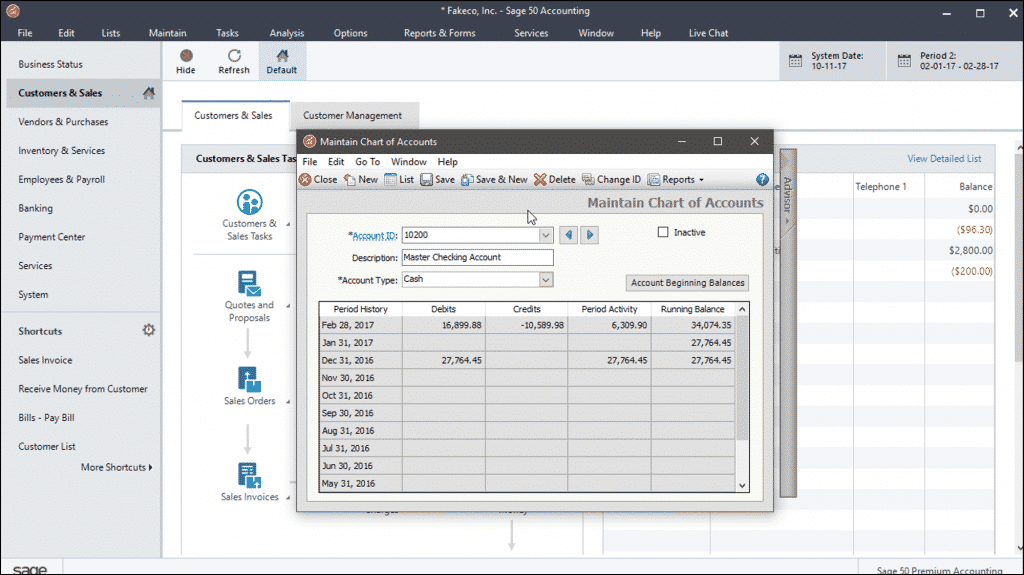
Create New Accounts in Sage 50 – Instructions: A picture of the "Maintain Chart of Accounts" window in Sage 50.
You will also see a small window appear at the right side of all the "Maintain" windows, such as this one. This side window is the "Setup Advisor" panel. This panel shows you information about the purpose and possible uses of whichever field you currently have selected within the "Maintain" window. You can collapse the panel by clicking the "X" in the upper-right corner. You can click the collapsed panel to expand it again and show the field information.
To create new accounts in Sage 50, click the "New" button in the toolbar, if needed. Then enter the Account ID to give to the account, the description of the account, and then select the account type. Let's look at the information that we must provide Sage 50 in order to add accounts to the chart of accounts.
The first thing that you must provide Sage 50 with is an account number. Sage 50 allows the use of both alphabetic and numeric characters in its account numbers. You should set up an account numbering system that is both systematic and coherent. The account numbering system you apply should be easy for others to both use and understand. In a traditional General Ledger, individual accounts are numbered and placed into numeric ranges similar to the accounts shown in the following table. This can be a helpful guide for establishing account numbers in Sage 50.
Account Range: | Account Types: |
| 10000 | Cash, Accounts Receivable, Assets |
| 20000 | Accounts Payable, Liabilities. |
| 30000 | Equity Accounts |
| 40000 | Income Accounts |
| 50000- 70000 | Cost of Sales, Expenses |
| 80000 | Other Income |
| 90000 | Other Expenses |
Sage 50's sample companies use account numbering schemes similar to the ones illustrated in this table. As you create new accounts in Sage 50, keep in mind a few rules about the ID Codes:
- They can contain up to 15 characters.
- You can modify account IDs after they have been created.
- You can modify account descriptions at any time.
- Spaces between characters are allowed.
- Account numbers are sorted alphabetically: numbers first, then letters.
- Accounts numbers are not case-sensitive.
- There can only be one Retained Earnings account.
Once you have entered an account ID, type a description of the account into the "Description" field. Descriptions can be changed at any time. After that, assign the account to one of Sage 50's account types by using the "Account Type" drop-down. They are: "Accounts Payable," "Accounts Receivable," "Accumulated Depreciation," "Cash," "Cost of Sales," "Equity- doesn't close," "Equity- gets closed," "Equity- Retained Earnings," "Expenses," "Fixed Assets," "Income," "Inventory," "Long Term Liabilities," "Other Assets," "Other Current Assets," and "Other Current Liabilities."
Remember to click the "New" button each time before you add a new account in the "Maintain Chart of Accounts" window and to also click the "Save" button after creating each new account to save it into the list. Alternatively, you can save a step in this process by simply clicking the "Save & New" button, instead.
Create New Accounts in Sage 50: Instructions
- To open the "Maintain Chart of Accounts" window, select "Maintain| Chart of Accounts…" from the Menu Bar.
- The toolbar at the top of the window contains buttons that let you modify the accounts.
- Below that, the "Account ID" drop-down identifies accounts by ID number.
- The "Change ID" button lets you change selected account IDs.
- The "Description" field shows an account's description.
- The "Inactive" checkbox lets you inactivate selected accounts.
- To select an existing account, click the "Account ID" drop-down.
- Then click any account ID to select it.
- To view a list of all your accounts, click the "List" button in the window's toolbar to open an account list in a new window.
- The small panel at the right side of all "Maintain" windows, like this one, is the "Setup Advisor" panel.
- This panel shows information about the currently selected field within the "Maintain" window.
- To collapse the panel, click the "X" in its upper-right corner.
- If you want to expand it, click the collapsed panel.
- To add new accounts in Sage 50, click the "New" button in the toolbar, if needed.
- Type an account ID into the "Account ID" field.
- Type an account description into the "Description" field.
- Select an account type from the drop-down at the right end of the "Account Type" field.
- Click "Save" in the window's toolbar to save your changes.
- Click the "New" button in the window's toolbar to create another new account.
- Return to step 15, above, and then repeat the steps until you enter all your accounts.
- Alternatively, click the "Save & New" button to consolidate steps 18 and 19 in this process.
- Click the "Close" button in the window's toolbar to close it.
Create New Accounts in Sage 50: Video Lesson
The following video lesson, titled "Adding Accounts," shows how to create new accounts in Sage 50. This video lesson is from our Sage 50 tutorial, titled "Mastering Sage 50 Made Easy v.2018."
Tagged under: account, accounts, add, course, create, Create New Accounts in Sage 50, help, how-to, instructions, learn, lesson, maintain chart of accounts, new, overview, sage 50, Sage 50 2018, self study, teach, training, tutorial, video
How to Add a New User on Sage 50 Accounts
Source: https://www.teachucomp.com/create-new-accounts-in-sage-50-instructions/
0 Response to "How to Add a New User on Sage 50 Accounts"
Post a Comment